

With Zapier’s help, you can pass the contacts from LiveChat to Autopilot account. Right after the chat ends, the customer will be added to the contacts in your Autopilot, and all the info from the pre-chat survey will be attached to this contact details.
Configuration
Creating a Zap consist of three main parts:
- Setting up the trigger
- choosing an event that will start data passing - Configuring the action
- setting up what will happen in the target app - Launching the Zap
- turning the integration on
Setting up LiveChat trigger
To get started, log in to Zapier and click on the Make a Zap! button in the top menu. Next, select LiveChat as the triggering application.
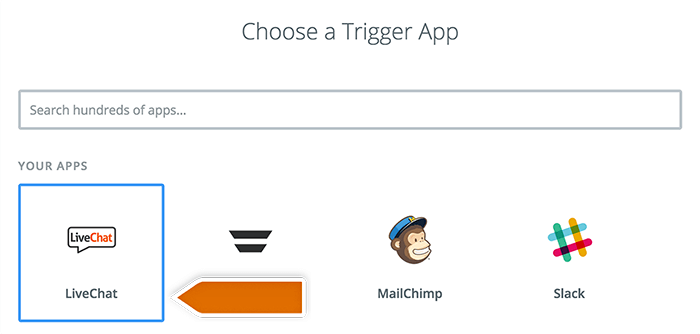
Choose Finished Chat as a trigger and click on Continue.

If you haven’t connected your LiveChat account to Zapier yet, you will be asked to provide your LiveChat login email and API key. API key can be found here.
Configuring the action in Autopilot
Time for the second part, in which you’ll need to set the data which will be passed to Autopilot. First, choose Autopilot as Action App and click on the Continue button.
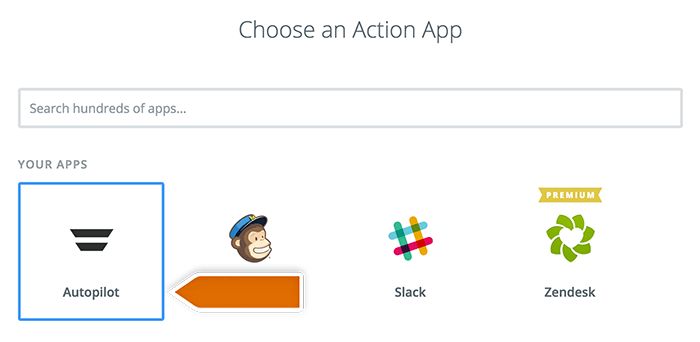
Then select the Add Contact as an action and confirm your choice.
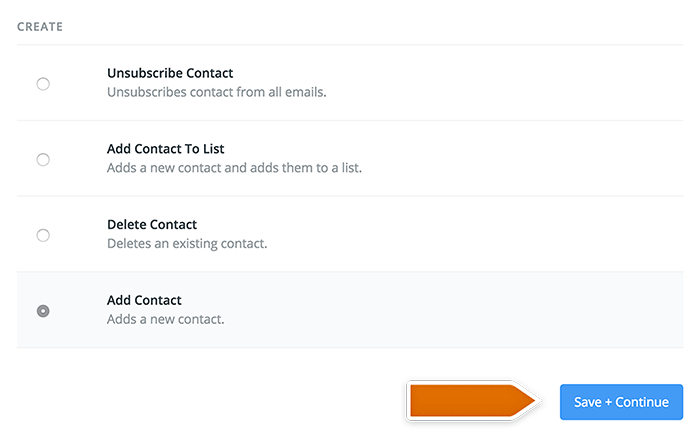
You will be directed to the next page. Choose your Autopilot account and click on Save + Continue.
Next step is to Set up Template. Map the fields of your pre-chat survey with Autopilot contact details fields.
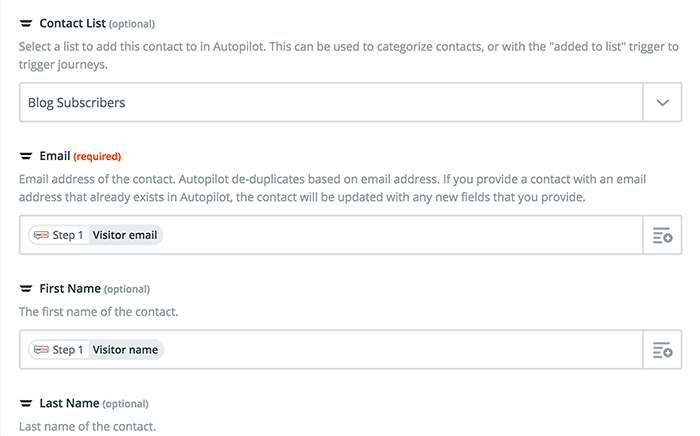
Click on Continue at the bottom of this page once that’s done.
Launching the Zap
All that’s left to do is to test the trigger. Click on the Test LiveChat trigger button. Follow the test instructions to finalize the setup. When the test is done, click on the Continue button.
Now you can turn your new Zap on. Click on the Turn Zap On to wrap the integration up.

With this kind of setup, whenever a chat ends, person who chatted with you will be added to your contacts in Autopilot along with all the info that they provided in the pre-chat form.****
****